|
Step 14
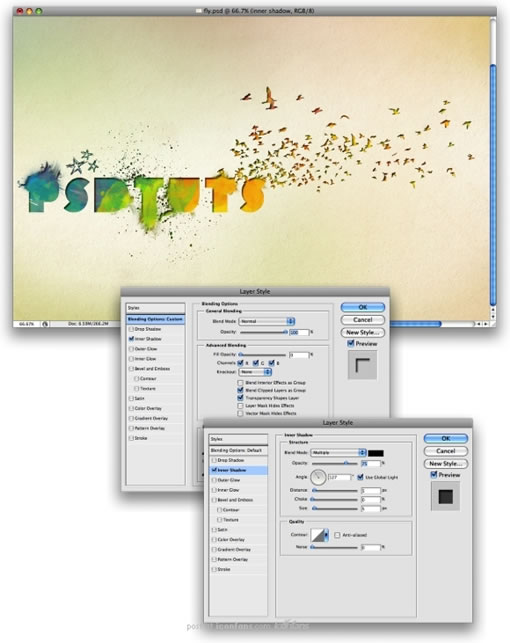
Duplicate the group we have just used on the previous step and go to Layer > Merge Group. This layer has to be beneath the "Watercolor" group. After that go to Layer > Layer Style > Blending Options. Change the Fill Opacity to 0%. Select Inner Shadow and change the Blend Mode to Multiply. Use 75% for the Opacity, 5 pixels for the Distance and Size, 130º for the Angle, and Choke set to 0.
把我们前面用到的组复制一个副本,然后合并图层,这个新图层在“watercolor”组的下方,然后进行:图层-图层样式-混合选项,改变填充透明度为0%,选中“内阴影”并把它的混合模式设定为“叠加”,透明度为75%,5px的距离以及130度的角度,阻塞设为0。
Step 15
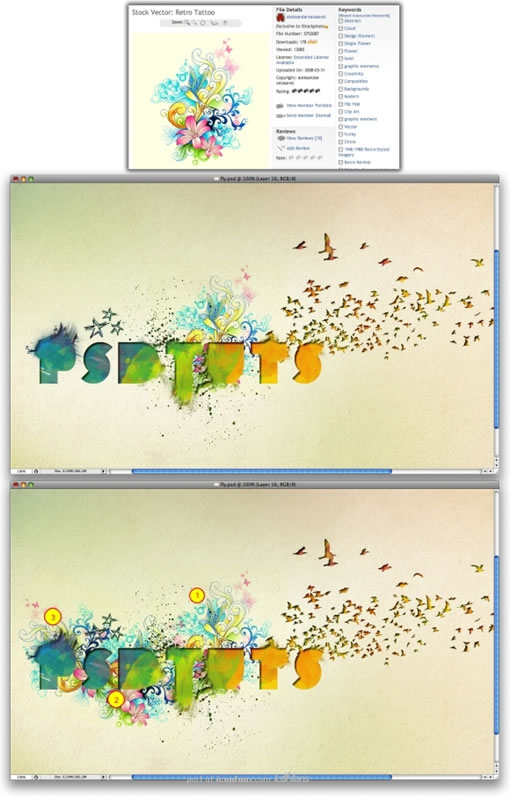
Here I used one image of a linear floral design from iStockphoto. Place it in your design and change the Blend Mode to Multiply. This layer has to go beneath the watercolor layers. Duplicate the layer twice. Rotate and place them behind the D, P, and S. Use the image below as a reference.
接用来用一张如下的矢量花朵的图片,把它导入到你的文档中,图层叠加模式为“叠加”,这个图层必须被放置在“watercolor”组的后面,复制这个图层两次,旋转后将三个图层中的图案分别移到字母“D/P/S”的后面做为修饰。
出处:蓝色理想
责任编辑:bluehearts
上一页 photoshop艺术效果 [5] 下一页 photoshop艺术效果 [7]
◎进入论坛Photoshop、Fireworks版块参加讨论,我还想发表评论。
|


