|
Step 5
Now using a black brush, simply draw over the eyes. But do this into the mask that was automatically created. In a portrait it is important that the eyes are not covered by the shadow. They need to be visible.
现在使用一个黑色笔刷,对曲线层蒙版进行修饰,对着眼睛周围的阴影进行修饰,注意不要让笔刷盖到眼睛上。
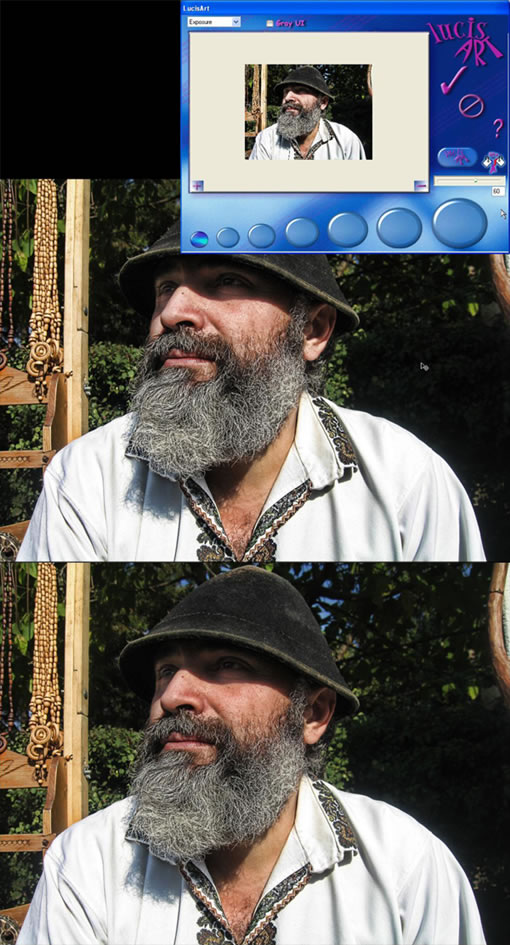
Step 6
Next press Command + A to make a selection, go to Edit > Copy Merged, and again go to Edit > Paste. Then go to Filter > Lucis > LucisArt and this time select Exposure and set it to 60. Then set the Opacity to 50%.
下面按 CTRL+A 全选(苹果上 就是 commnd+a),然后点 编辑-合并拷贝 然后 编辑-粘贴 (英文版对照原文操作)。然后 滤镜-LUCIS-LUCISART,这次选择 exposure(定时曝光)设置参数 为 60.然后设置不透明度为 50%。
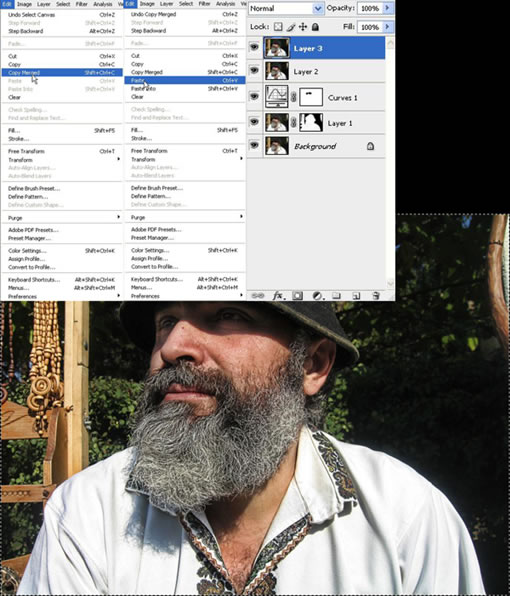
Step 7
Press Command + A to make a selection over the entire image. Then again go to Edit > Copy Merged and Edit > Paste.
按 CTRL+A 全选,再次 合并拷贝 & 粘贴。
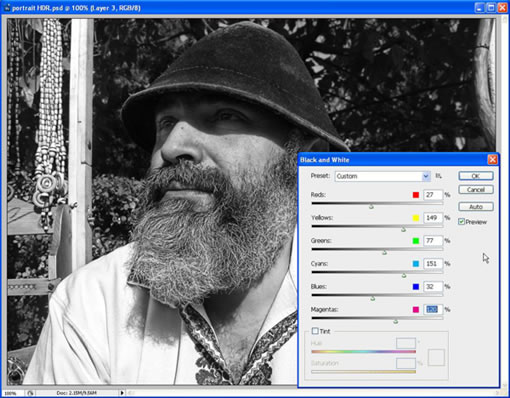
Step 8
Now that you have all the layers copied go to Image > Adjustments > Black And White and play with the settings there.
现在你有了一个合并了所有图层的COPY,执行 图像-调整-BLACK AND WHITE 进行相应调整设置。(这里就是通过各通道来混调图片的灰度效果,降低了红色、蓝色,略微提升了绿色,大幅度提升了CMY三通道的亮度让亮度差更明显,这就是HDR的精髓提高整幅图片的光感。)
出处:蓝色理想
责任编辑:bluehearts
上一页 PS和专业滤镜让普通相片变HDR效果 [1] 下一页 PS和专业滤镜让普通相片变HDR效果 [3]
◎进入论坛Photoshop、Fireworks版块参加讨论,我还想发表评论。
|


