|
Part II - Applying HDR Styling to a Close-Up Image
第二部分 - 特写图片中应用HDR效果
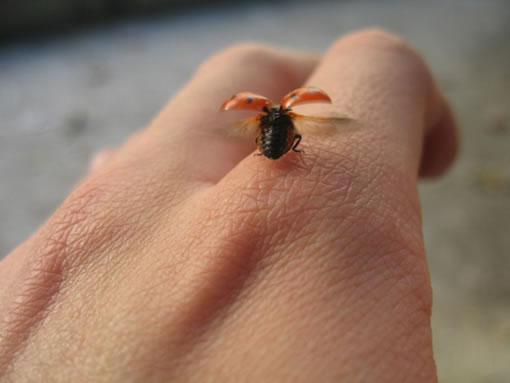
Next we'll do another personal photograph that I actually love very much. This is macro photography. The image isn't perfect because I shot it very fast, as the ladybug was flying away.
下面我们将要制作另一类个人摄影,我很喜欢这张图片。这是一张特写摄影,因为我拍摄的很快所以图片并不是很完美,瓢虫有点飞起来的感觉。
Final Image Preview for Part II
第二部分 完成图 预览!
(点击上图全尺寸观看)
Step 1
Open up the image.
打开图片。
Step 2
We'll use similar techniques that I showed you in Part I, but we'll use different settings. Also, we'll place the lights in different places. Start by duplicating the image and go to Filter > Lucis > LucisArt and select Sculpture set to 25.
我们使用类似第一部分的相同方法,但设置上略有不同,我们将光线放在不同的地方。复制底层,执行滤镜-LUCIS-LUCISART 选择 雕刻 设置参数为 25.

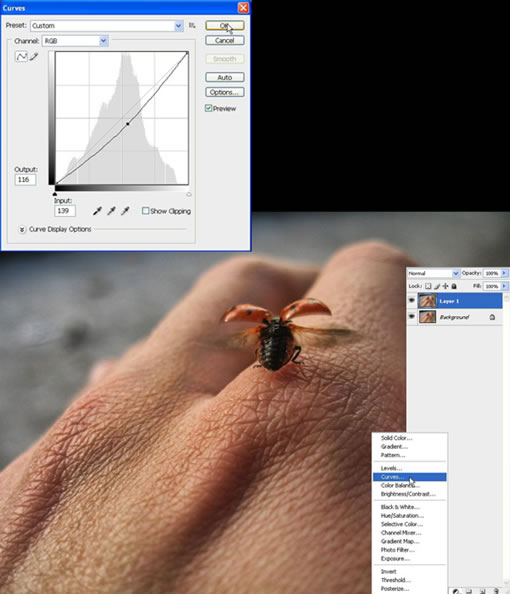
Step 3
Next go to Create New Fill Or Adjustment Layer and select Curves, and drag the line down a bit.
建立曲线调整层,右下一小点就可以。
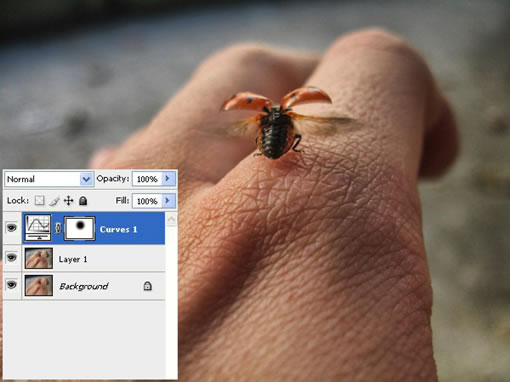
Step 4
Now using the Gradient Tool (G) set to black, lighten the ladybug, as she is our focal point here. Do this in the Layer Mask thumbnail.
(基于曲线层蒙版操作)现在我们使用 渐变工具 设置前景色黑色,盖住瓢虫的部分,是为了让瓢虫的部分变亮,因为它是焦点部分,
出处:蓝色理想
责任编辑:bluehearts
上一页 PS和专业滤镜让普通相片变HDR效果 [3] 下一页 PS和专业滤镜让普通相片变HDR效果 [5]
◎进入论坛Photoshop、Fireworks版块参加讨论,我还想发表评论。
|


