|
Step 10
Mask the layer and fill the mask with black. Next using a white brush you'll need to draw over the ladybug again to bring some more light on her.
蒙版该层&填充黑色,使用白色笔刷画瓢虫的部分,是它更亮。

Step 11
Press Command + A to select everything again, go to Edit > Copy Merged, and then Edit > Paste. Next go to Filter > Lucis > LucisArt and set Sculpture at 10.
然后再次CTRL+A 全选, 编辑-合并拷贝,然后编辑-粘贴。滤镜-LUCIS-LUCISART 选择 雕刻(参数10)。

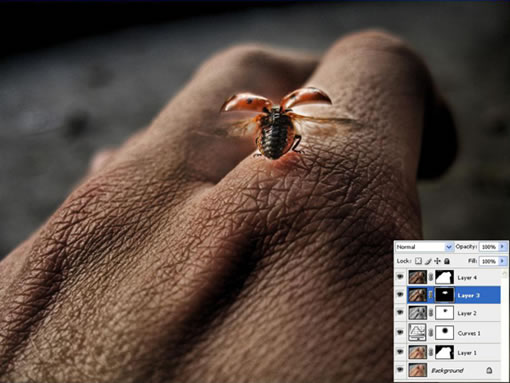
Step 12
Mask it and using a black brush, cover the background behind the hand.
蒙版该层使用黑色笔刷,覆盖手后面的背景区域。(这步是对背景进行修饰了)
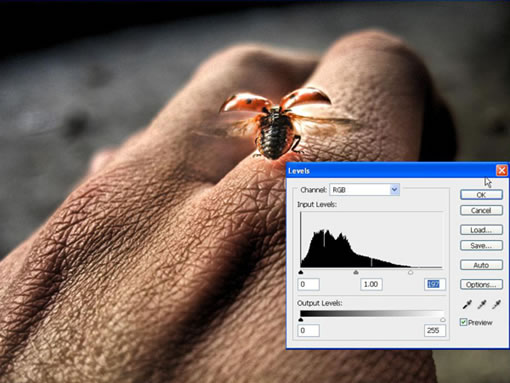
Step 13
Last step is to go to Create New Fill Or Adjustment Layer and select Levels. For the Levels use 0, 1.00, 197 and then press OK.
最后的步骤了,建立色阶调整层 参数如下 0 1.00 197 然后OK 。(把色阶的亮部拉到正常的位置,提升一点点亮度,是这步的目的!)
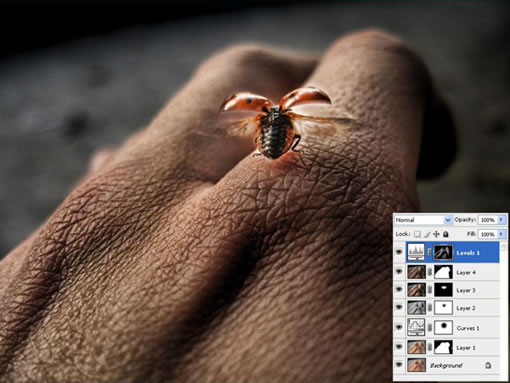
Step 14
Mask the layer and fill it with black. Then with a small white low Opacity brush, simply draw over the ladybug to make her more detailed. Try not to draw all over her, just a few parts to make them pop out.
蒙版该层填充黑色,然后用(低透明度的)白色小笔刷,简单的刷刷小瓢虫让它更细腻,不要完全把它画上,只是一点点的突出。(如过你注意点会发现,瓢虫翅膀上的光减弱了一点点。很细腻的局部调整!)
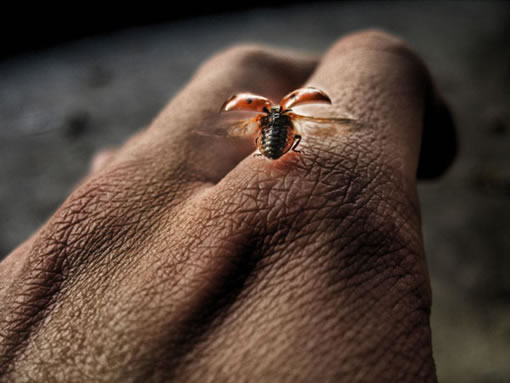
Conclusion of Part II
This effect is something I personally use. You can experiment with the filter and get a lot of different effects. The final image is below and you can view the larger image here.
第二部分总结,你可以用滤镜去试验其他一些不同的效果,点击HERE看大图。(根据LUCIS官网的介绍,LUCIS对光的调整相当的强悍!国内很少讲关于LUCIS的教程,希望高手们多多利用该滤镜实现完美的HDR效果)
(点击上图全尺寸观看)
出处:蓝色理想
责任编辑:bluehearts
上一页 PS和专业滤镜让普通相片变HDR效果 [5] 下一页 PS和专业滤镜让普通相片变HDR效果 [7]
◎进入论坛Photoshop、Fireworks版块参加讨论,我还想发表评论。
|