|
Step 5
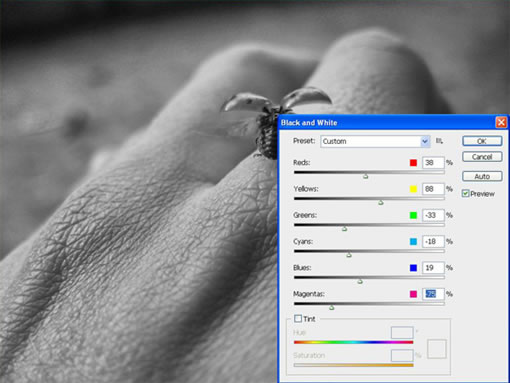
Next press Command + A to select everything, go to Edit > Copy Merged, and then go to Edit > Paste. Next, go to to Image > Adjustments > Black and White and use my settings below, or maybe play with them as you see fit.
ÿ�ζ�Ҫ CTRL+A Ȼ�� �༭-�ϲ�������Ȼ�� �༭-ճ����(������仰����5���� ��) Ȼ��ͼ��-����-B&W������ͼ����е�����OK �ˣ�(��Ҫ��������ɫ����죬������߹�еķ��)
Step 6
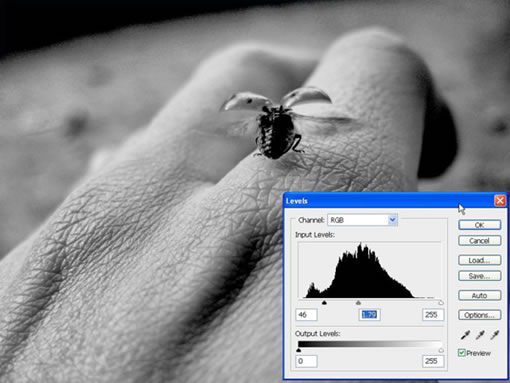
Next go to Image > Adjustments > Levels and set it at: 46, 1.79, and 225. Then press OK.
��һ�� ͼƬ-����-ɫ�� ����ɫ�� ����Ϊ 46��1.79��225��Ȼ��ȷ��������ɫ���ⲽĿ����Ϊ��������ɫ��Ȼ�����Իҵ���ɫ������ע�������������255��λ�ó�����ɫ��Χ����������Ҳ�ǽ���������������ʾ��λ�á�˵������ͨ���������Ƚ��е�����ϣ��������������⡣��
Step 7
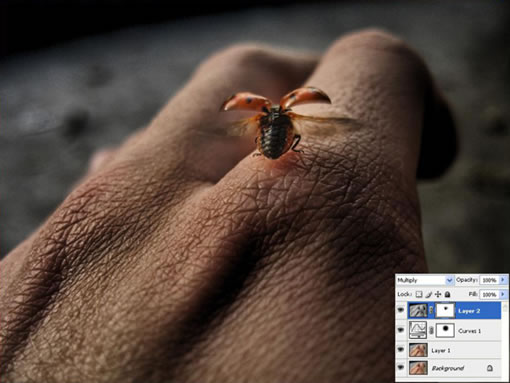
Set the layer to Multiply.
��ͼ��ģʽ��Ϊ��Ƭ���ס�
Step 8
Make a mask for this layer. Then using the black Gradient Tool (G) set to Radial, lighten the ladybug, as I did below.
Ϊ�ò�����ͼ���ɰ棬Ȼ��ʹ�� ���乤��(����) ǰ��ɫ��Ϊ��ɫ ������ղ���������ư��IJ�λ��
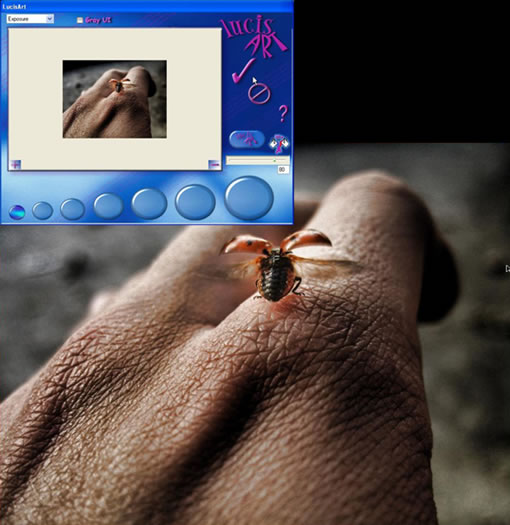
Step 9
Next press Command + A to select everything, go to Edit > Copy Merged, and then Edit > Paste. Next go to Filter > Lucis > LucisArt and set the Exposure to 80.
���� ���� CTRL+A ȫѡͼ�㣬 �༭-�ϲ��������༭-ճ�����˾�-LUCIS-LUCISART �ع�����Ϊ80.
��������ɫ����
���α༭��bluehearts
��һҳ PS��רҵ�˾�����ͨ��Ƭ��HDRЧ�� [4] ��һҳ PS��רҵ�˾�����ͨ��Ƭ��HDRЧ�� [6]
�������̳Photoshop��Fireworks���μ����ۣ��һ�������������
|


